身份验证和授权在维护 web 应用程序及其用户安全性和隐私性方面起着至关重要的作用。今天我们就来看下 Blazor Server 如何进行身份验证和授权。在 Blazor Server 中实现身份验证需要几个关键元素。包括:
- 浏览器数据存储,可以通过内存、本地存储或会话存储来实现。此存储负责维护用户数据,并确保用户在打开新的标签或刷新页面时,这些数据仍然存在。
- AuthenticationStateProvider 负责管理用户身份验证,确定用户是否登录。它包含业务逻辑,并负责通过其他元素有关用户的身份状态。
- CascadingAuthenticationState 作为根组件,负责在整个网站上传递身份验证状态。它在后台无缝运行,无需修改或配置。
- AuthorizeRouteView 是一个路由级别进行授权的组件。可以根据用户身份验证状态和授权要求来显示或隐藏不同的页面内容。
- AuthorizeView 组件级别进行授权,可以根据用户的身份验证状态和角色要求来显示或隐藏组件内容。
具体操作如下:
- 右击项目创建一个 Models 文件夹,在该文件夹下创建一个用户信息类(UserInfo),代码如下:
#nullable disableusing System.Security.Claims;namespace BlazorApp.Models{public class UserInfo{public string UserName { get; set; }public List<string> Roles { get; set; } = new();public ClaimsPrincipal ToClaimsPrincipal() => new(new ClaimsIdentity(new Claim[]{new (ClaimTypes.Name, UserName)}.Concat(Roles.Select(r => new Claim(ClaimTypes.Role, r)).ToArray()),"Lih.Identity"));}}在新建 ClaimsIdentity 时,始终要确保包含 authenticationType 参数,并保持一致。 - 右击项目创建一个 Services 文件夹,创建一个 IAuthenticationService 接口和 LihAuthenticationStateProvider 类。IAuthenticationService 接口代码如下:
using BlazorApp.Models;using Microsoft.AspNetCore.Components.Authorization;namespace BlazorApp.Services{public interface IAuthenticationService{Task<AuthenticationState> GetAuthenticationStateAsync();Task SignInAsync(UserInfo? user);Task SignOutAsync();}}LihAuthenticationStateProvider 类继承 AuthenticationStateProvider 和 IAuthenticationService 接口,代码如下:using BlazorApp.Models;using Microsoft.AspNetCore.Components;using Microsoft.AspNetCore.Components.Authorization;using Microsoft.AspNetCore.Components.Server.ProtectedBrowserStorage;using System.Security.Claims;namespace BlazorApp.Services{public class LihAuthenticationStateProvider : AuthenticationStateProvider, IAuthenticationService{readonly ProtectedSessionStorage _sessionStorage;readonly NavigationManager _navManager;readonly ILogger _logger;readonly ClaimsPrincipal _anonymous = new(new ClaimsIdentity());public LihAuthenticationStateProvider(ILogger<LihAuthenticationStateProvider> logger, NavigationManager navManager, ProtectedSessionStorage sessionStorage){_logger = logger;_navManager = navManager;_sessionStorage = sessionStorage;}public override async Task<AuthenticationState> GetAuthenticationStateAsync(){try{var sessionStorageResult = await _sessionStorage.GetAsync<UserInfo>("Lih.BlazorApp");if (sessionStorageResult.Success && sessionStorageResult.Value != null){var user = sessionStorageResult.Value;var principal = user.ToClaimsPrincipal();return new AuthenticationState(principal);}return new AuthenticationState(_anonymous);}catch (Exception ex){_logger.LogError(ex, ex.Message);return new AuthenticationState(_anonymous);}}public async Task SignInAsync(UserInfo? user){ClaimsPrincipal claimsPrincipal;if (user != null){claimsPrincipal = user.ToClaimsPrincipal();await _sessionStorage.SetAsync("Lih.BlazorApp", user);}else{claimsPrincipal = _anonymous;await _sessionStorage.DeleteAsync("Lih.BlazorApp");}NotifyAuthenticationStateChanged(Task.FromResult(new AuthenticationState(claimsPrincipal)));}public async Task SignOutAsync(){await SignInAsync(null);var returnUrl = _navManager.ToBaseRelativePath(_navManager.Uri);//这里跳转到登录页面,并带上当前地址_navManager.NavigateTo($"/login?returnUrl={returnUrl}");}}}这里使用 ProtectedSessionStorage 来存储用户状态,也可以使用 ProtectedLocalStorage 。它们之间的区别在于数据的生命周期和存储位置。生命周期:ProtectedSessionStorage 存储的数据在用户的会话期间保持有效,即用户关闭浏览器标签或浏览器会话结束时,数据将被删除。而 ProtectedLocalStorage 存储的数据则是永久性的,除非用户显式地删除或通过代码删除,否则数据将一直保留在本地存储中。存储位置:ProtectedSessionStorage 将数据存储在用户的浏览器内存中,而 ProtectedLocalStorage 则将数据存储在用户的浏览器硬盘上。 - 更新 Program.cs
builder.Services.AddScoped<AuthenticationStateProvider,LihAuthenticationStateProvider>();builder.Services.AddScoped<IAuthenticationService,LihAuthenticationStateProvider>(); - 在 _Import.razor 文件中,添加引用。
@using Microsoft.AspNetCore.Components.Routing@using Microsoft.AspNetCore.Components.Web@using Microsoft.JSInterop@using BlazorApp@using AntDesign@using Microsoft.AspNetCore.Authorization@using Microsoft.AspNetCore.Components.Authorization@using Services@using Models - 创建一个简单的登录页面,如下:
@page "/login"@inject IAuthenticationService _authService@inject NavigationManager _navManager<div style="display: flex; justify-content: center;"><Card Title="登录窗体" Style="width:400px;margin-top:120px;"><Body><Form Model="@info"OnFinish="OnFinish"><FormItem Label="用户名" Required><Input @bind-Value="@context.UserName" /></FormItem><FormItem Label="角色" Required><Select Mode="multiple"Placeholder="请选择角色"TItemValue="string"TItem="string"@bind-Values="context.Roles"><SelectOptions><SelectOption TItemValue="string" TItem="string" Value="@("administrator")" Label="管理员" /><SelectOption TItemValue="string" TItem="string" Value="@("normal")" Label="标准" /></SelectOptions></Select></FormItem><FormItem WrapperColOffset="8" WrapperColSpan="16"><Button Type="@ButtonType.Primary" HtmlType="submit">登录</Button></FormItem></Form></Body></Card></div>@code {UserInfo info = new UserInfo();void OnFinish(){_authService.SignInAsync(info);//登录成功强制跳转_navManager.NavigateTo("/dashboard", true);}} - 在 App.razor 文件中设置根组件及 AuthorizeRoutView 组件,代码如下
@inject NavigationManager navManager<CascadingAuthenticationState><Router AppAssembly="@typeof(App).Assembly"><Found Context="routeData"><AuthorizeRouteView RouteData="@routeData"><Authorizing></Authorizing><NotAuthorized>@{// 获取当前用户的身份验证状态var user = context.User;// 如果用户未经身份验证,则重定向到登录页面if (user.Identity == null || !user.Identity.IsAuthenticated){var returnUrl = navManager.ToBaseRelativePath(navManager.Uri);navManager.NavigateTo("/login?returnUrl=/" + returnUrl, true, true);}else{<PageTitle>拒绝访问</PageTitle><LayoutView Layout="@typeof(Shared.MainLayout)"><Result Status="403" Title="403" SubTitle="您无权查看该页面。" /></LayoutView>}}</NotAuthorized></AuthorizeRouteView><FocusOnNavigate RouteData="@routeData" Selector="h1" /></Found><NotFound><PageTitle>Not found</PageTitle><LayoutView Layout="@typeof(Shared.MainLayout)"><Result Status="404" Title="404" SubTitle="您已失联,请尽快与总部取得联系。" /></LayoutView></NotFound></Router></CascadingAuthenticationState><AntContainer />使用 ProtectedSessionStorage 的时候会发出 JavaScript 的调用,需要更新 _Host.cshtml 文件,将组件预渲染改成在服务端渲染。否则 ProtectedSessionStorage 在获取数据时会报异常。

- 切换到 Dashboard.razor 组件,添加一行 @attribute [Authorize] 。到这可以运行看一下。在浏览器输入 /dashboard, 未登录的情况会自动跳转到 /login 。
- 接下来,更新 AntLayout.razor 组件。使用 AuthorizeView 组件,在角色为管理员时显示“用户管理” 和“角色管理”,并在 Header 上显示当前登录的用户名。具体的代码如下:
@inherits LayoutComponentBase@inject IAuthenticationService _authService@inject NavigationManager navManager<main class="page"><Layout><Sider @bind-Collapsed=@collapsed NoTrigger>@if (collapsed){<div class="logo"><span>哩厚</span></div>}else{<div class="logo"><span>哩厚dotNET后台管理</span></div>}<Menu Theme="MenuTheme.Dark" Mode="MenuMode.Inline" DefaultSelectedKeys=@(new[]{"1"})><AuthorizeView Roles="administrator,normal"><Authorized><MenuItem Key="1"><NavLink href="/dashboard"><Icon Type="dashboard" Theme="outline" /><span>Dashboard</span></NavLink></MenuItem></Authorized></AuthorizeView><AuthorizeView Roles="administrator"><Authorized><MenuItem Key="2"><NavLink href="/home/index"><Icon Type="user" Theme="outline" /><span>用户管理</span></NavLink></MenuItem><MenuItem Key="3"><Icon Type="crown" Theme="outline" /><span>角色管理</span></MenuItem></Authorized></AuthorizeView></Menu></Sider><Layout Class="site-layout"><Header Class="header" Style="padding: 0;">@if (collapsed){<Icon Type="menu-unfold" Theme="outline" Class="trigger" OnClick="toggle" />}else{<Icon Type="menu-fold" Theme="outline" Class="trigger" OnClick="toggle" />}<Menu Mode=MenuMode.Horizontal><SubMenu TitleTemplate="@avatarTitle"><MenuItem OnClick="_authService.SignOutAsync">退出</MenuItem></SubMenu></Menu></Header><Content Class="site-layout-background" Style="margin: 12px 12px 0px;padding:10px;">@Body</Content><Footer Class="site-footer">哩厚dotNET后台管理 ©2023 Created by susd</Footer></Layout></Layout></main>@code{bool collapsed;void toggle(){collapsed = !collapsed;}RenderFragment avatarTitle =@<Template><Space><SpaceItem>你好,<AuthorizeView><Authorized>@context.User.Identity?.Name</Authorized></AuthorizeView></SpaceItem><SpaceItem><Avatar Alt="用户头像" Src="images/avatar.jpg"></Avatar></SpaceItem></Space></Template>;}另外在 AntLayout.razor.css 样式文件里添加如下样式:::deep .header {padding: 0;background: #fff;position: relative;display: flex;justify-content: space-between;z-index: 9;align-items: center;}除了上面改动,还需要在对应组件做修改@attribute [Authorize(Roles ="administrator")]运行,以管理员的身份登录进去,结果如下图: 以标准角色登录后截图如下:
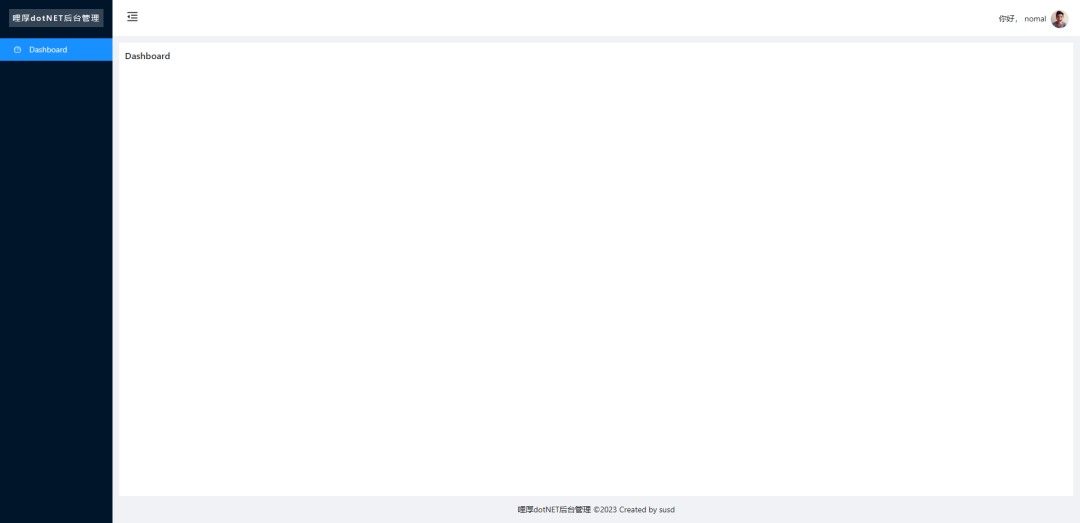
好了,整体的身份验证授权就到这,为了方便登录方法省去了很多,如数据库查询用户,密码匹配。但不打紧可自行补充完整就可以。有些授权控制的比较细可以加上策略。但这不影响整体的流程。
最后,祝大家学习愉快!
声明:文中观点不代表本站立场。本文传送门:https://eyangzhen.com/125723.html