
一,树的简介
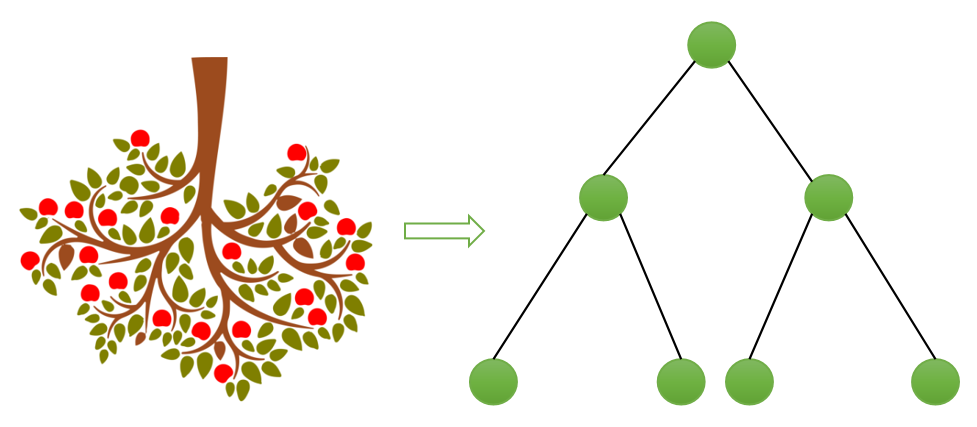

树结构的形状很像现实生活中一棵倒置的大树。
树结构是由一堆节点和边组成的具有层级关系的非线性数据结构。
树顶部的节点被称为根节点,它通常是搜索、遍历等操作的起始位置。
树结构在很多地方都有应用,比如操作系统中的文件结构。
树的常见概念:
根节点(Root):树的最顶层节点。
父节点(Parent Node):节点沿着边往上一层的节点称为该节点的父节点。
子节点(Child Node):节点沿着边往下一层的节点称为该节点的子节点。
兄弟节点(Sibling):同一个父节点的子节点互为兄弟节点。
边(Edge):父节点和子节点之间连接,形成边。
叶子节点(Leaf):没有子节点的节点称为叶子节点或者叶节点。
子树(Subtree):以某个子节点为根节点的树分支。
节点的深度(Depth):是指从根节点到该节点的距离。
节点的高度(Height):该节点到叶子节点的最长距离。
树的高度(Height of tree):根节点到叶子节点的最长距离。
节点的层级(Level):该节点的父节点数量+1。
节点的度(Degree):该节点的子节点数量。
二,二叉树的基础概念
每个节点最多有两个子节点的树被称为二叉树。
在给定的二叉树中,任何级别的最大节点数为 2 l-1,其中”l”是级别编号。
树有很多种,二叉树只是其中一种典型结构,二叉树与其他种类树的区别:
1.有些树的每个节点可以有若干个子节点,而二叉树的每个节点最多只能有两个子节点。
2.有些树的每个节点的子节点之间可以是无序的,两个子节点之间甚至可以交换位置。而(有序)二叉树中,每个节点的子节点之间需要区分是左子节点还是右子节点,即使整棵树就两个节点。
三,二叉树的图示结构与分类
(1),满二叉树(full binary tree)
每个节点都有0个或2个子节点的二叉树称为满二叉树。
满二叉树除叶子节点以外,所有节点都有两个子节点。
(2),完美二叉树(perfect binary tree)
所有的叶子节点都在同一层。
所有内部节点都必须有两个子节点。
(3),完全二叉树(complete binary tree)
完全二叉树除了最后一层之外的所有层次都被填满,最后一层有的位置只有左节点。
注意,满二叉树是特殊的完全二叉树。
四,二叉树的常见表示方式
方式一,链式存储——用链表结构来表示二叉树
    此时的二叉树被视为节点的集合。
    链表节点的构成:
        左指针,指向节点的左子节点的指针。
        数据域,节点存储的实际数据。
        右指针,指向节点的右子节点的指针。
如果给定节点没有子节点,或者该节点就是叶子节点,则该节点的左右指针设置为空null。
代码实现时,只需要先定义好根节点,等后面添加新节点进来时,再给新节点的左右指针进行赋值,这棵树就慢慢成形了。
方式二,顺序存储——用数组结构来表示二叉树
定义一个数组,用于存储树的所有节点。
树中的节点数决定了数组的大小。
数组的第一个位置存储根节点。
如果一个节点存储在第i位置,那么它的左子节点和右子节点分别存储在第2i和第2i+1位置。
Demo1.链式存储代码实现
1.二叉树初始化:
Python实现:
class Node:
def init(self, key):
self.left = None
self.right = None
self.val = key
C++实现:
//方式一,利用结构体实现
struct node {
int data;
struct node* left;
struct node* right;
};
//方式二,利用类实现
class Node {
public:
int data;
Node* left;
Node* right;
};
2.完整代码
Python实现:
class Node:
def init(self, key):
self.left = None
self.right = None
self.val = key
if name == ‘main‘:
#root node
root = Node(1)
root.left = Node(2)
root.right = Node(3)
root.left.left = Node(4)
”’
1
/
2 3
/ /
4 None None None
/
None None
”’
C++实现:
include
using namespace std;
class Node {
public:
int data;
Node* left;
Node* right;
Node(int val)
{
data = val;
left = NULL;
right = NULL;
}
};
int main()
{
//root node
Node* root = new Node(1);
root->left = new Node(2);
root->right = new Node(3);
root->left->left = new Node(4);
return 0;
/*
1
/
2 3
/ /
4 NULL NULL NULL
/
NULL NULL
*/
}
Demo2.顺序存储代码实现
Python实现:
tree = [None] * 10
def root(key):
if tree[0] != None:
print(“Tree already had root”)
else:
tree[0] = key
def set_left(key, parent):
if tree[parent] == None:
print(“Can’t set child at”, (parent * 2) + 1, “, no parent found”)
else:
tree[(parent * 2) + 1] = key
def set_right(key, parent):
if tree[parent] == None:
print(“Can’t set child at”, (parent * 2) + 2, “, no parent found”)
else:
tree[(parent * 2) + 2] = key
root(‘A’);
set_left(‘B’, 0);
set_right(‘C’, 0);
set_left(‘D’, 1);
set_right(‘E’, 1);
set_right(‘F’, 2);
print(tree)
”’
A(0)
/
B(1) C(2)
/
D(3) E(4) F(5)
”’
运行结果:
[‘A’, ‘B’, ‘C’, ‘D’, ‘E’, None, ‘F’, None, None, None]
C++实现:
include
using namespace std;
char tree[10];
int root(char key) {
if (tree[0] != ‘�’)
cout << “Tree already had root”;
else
tree[0] = key;
return 0;
}
int set_left(char key, int parent) {
if (tree[parent] == ‘�’)
cout << “nCan’t set child at “
<< (parent * 2) + 1
<< ” , no parent found”;
else
tree[(parent * 2) + 1] = key;
return 0;
}
int set_right(char key, int parent) {
if (tree[parent] == ‘�’)
cout << “nCan’t set child at “
<< (parent * 2) + 2
<< ” , no parent found”;
else
tree[(parent * 2) + 2] = key;
return 0;
}
int print_tree() {
cout << “n”;
for (int i = 0; i < 10; i++) {
if (tree[i] != ‘�’)
cout << tree[i];
else
cout << ” “;
}
return 0;
}
int main() {
root(‘A’);
set_left(‘B’, 0);
set_right(‘C’, 0);
set_left(‘D’, 1);
set_right(‘E’, 1);
set_right(‘F’, 2);
print_tree();
return 0;
/*
A(0)
/
B(1) C(2)
/
D(3) E(4) F(5)
*/
}
运行结果:
ABCDE F
五,二叉树的遍历方式
方式一,深度优先遍历
深度优先遍历是从第一个节点开始遍历二叉树并到达没有子节点的最深节点,在到达最深节点后,回退到它的父节点,然后递归地执行此操作,直到遍历所有节点。
二叉树的深度优先遍历,先将树分为三个部分即根节点、左子树和右子树,由此生成了三种遍历方式:
方式1.前序遍历:
step.01:处理根节点。
step.02:移动到左子树并递归遍历。
step.03:移动到右子树并递归遍历。
遍历顺序:A → B → D → E → C → F → G
方式2.中序遍历:
step.01:移动到左子树并递归遍历。
step.02:处理根节点。
step.03:移动到右子树并递归遍历。
遍历顺序: D → B → E → A → F → C → G
方式3.后序遍历:
step.01:移动到左子树并递归遍历。
step.02:移动到右子树并递归遍历。
step.03:处理根节点。
遍历顺序:D → E → B → F → G → C → A
注意,在递归遍历的时候,里面”处理根节点”这一步,有可能是在处理子树的根节点,步骤中提到的根节点是一直随着子树变化的。
用C++代码表示它们的递归调用写法,注意cout打印语句在三个函数中的位置:
void preorder(Node *root)
{
if(!root)
return;
cout<data<<” “; preorder(root->left);
preorder(root->right);
}
void inorder(Node *root)
{
if(!root)
return;
inorder(root->left);
cout<data<<” “; inorder(root->right);
}
void postorder(Node *root)
{
if(!root)
return;
postorder(root->left);
postorder(root->right);
cout<data<<” “;
}
方式二,广度优先遍历
和图结构的操作方式类似,遍历从根节点开始,逐层进行遍历,每层从左到右对子节点进行遍历。
四种二叉树遍历方式的代码实现
场景:
前序遍历结果:1 2 4 5 3 6
中序遍历结果:4 2 5 1 3 6
后序遍历结果:4 5 2 6 3 1
广度优先遍历结果:1 2 3 4 5 6
Python实现:
class Node:
def init(self, data):
self.left = None
self.right = None
self.data = data
def preorder(self, root):
    res = []
    if root:
        res.append(root.data)
        res = res + self.preorder(root.left)
        res = res + self.preorder(root.right)
    return res

def inorder(self, root):
    res = []
    if root:
        res = self.inorder(root.left)
        res.append(root.data)
        res = res + self.inorder(root.right)
    return res

def postorder(self, root):
    res = []
    if root:
        res = self.postorder(root.left)
        res = res + self.postorder(root.right)
        res.append(root.data)
    return res

def level_order(self, root):
    res = []
    if root:
        queue = [root]
        while queue:
            currentNode = queue.pop(0)
            res.append(currentNode.data)
            if currentNode.left:
                queue.append(currentNode.left)
            if currentNode.right:
                queue.append(currentNode.right)
    return res
if name == ‘main‘:
root = Node(1)
root.left = Node(2)
root.right = Node(3)
root.left.left = Node(4)
root.left.right = Node(5)
root.right.right = Node(6)
print("前序遍历结果: ")
print(root.preorder(root))
print("中序遍历结果: ")
print(root.inorder(root))
print("后序遍历结果: ")
print(root.postorder(root))
print("广度优先遍历结果: ")
print(root.level_order(root))
运行结果:
前序遍历结果:
[1, 2, 4, 5, 3, 6]
中序遍历结果:
[4, 2, 5, 1, 3, 6]
后序遍历结果:
[4, 5, 2, 6, 3, 1]
广度优先遍历结果:
[1, 2, 3, 4, 5, 6]
C++实现:
include
include
using namespace std;
struct Node
{
int data;
Node* left;
Node* right;
};
Node* getNewNode(int data)
{
Node* temp = new Node;
temp->data = data;
temp->left = NULL;
temp->right = NULL;
return temp;
}
void preorder(Node* root)
{
if (!root)
return;
cout << root->data << ” “; preorder(root->left);
preorder(root->right);
}
void inorder(Node* root)
{
if (!root)
return;
inorder(root->left);
cout << root->data << ” “; inorder(root->right);
}
void postorder(Node* root)
{
if (!root)
return;
postorder(root->left);
postorder(root->right);
cout << root->data << ” “; } void level_order(Node* root) { if (!root) return; queue> q; q.push(root); while (!q.empty()) { Node temp = q.front(); q.pop(); cout << temp->data << ” “; if (temp->left != NULL)
q.push(temp->left);
if (temp->right != NULL)
q.push(temp->right);
}
}
int main()
{
Node* root = getNewNode(1);
root->left = getNewNode(2);
root->right = getNewNode(3);
root->left->left = getNewNode(4);
root->left->right = getNewNode(5);
root->right->right = getNewNode(6);
cout << “n前序遍历结果: ” << endl;
preorder(root);
cout << “n中序遍历结果: ” << endl;
inorder(root);
cout << “n后序遍历结果: ” << endl;
postorder(root);
cout << “n广度优先遍历结果: ” << endl;
level_order(root);
return 0;
}
运行结果:
前序遍历结果:
1 2 4 5 3 6
中序遍历结果:
4 2 5 1 3 6
后序遍历结果:
4 5 2 6 3 1
广度优先遍历结果:
1 2 3 4 5 6
六,参考阅读
《Problem Solving with Algorithms and Data Structures Using Python, Second Edition》
声明:文中观点不代表本站立场。本文传送门:https://eyangzhen.com/206819.html
