介绍一个调试C++代码的小工具——xeus-cling,我个人用了挺长时间了,提升了不小的效率,大概的使用场景是:
- 突然需要写一段C++代码验证逻辑效果对不对,而又不想搭建环境编译
- 有一段代码不确定方法API调用对不对,需要反复修改调试
有这玩意儿,我们可以直接在jupyter中调试你的C++代码,比如这样:
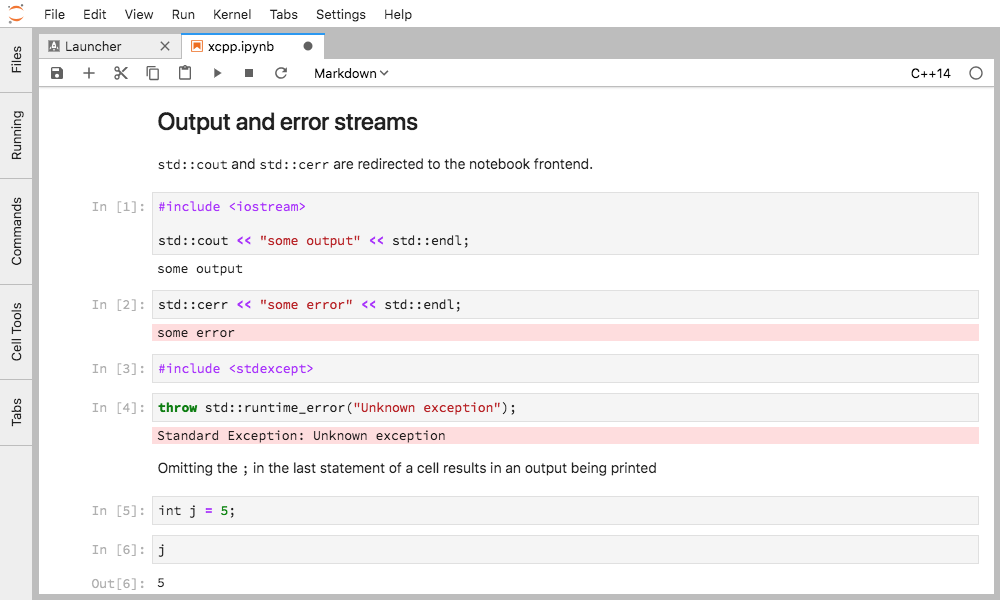

或者这样:
我用这个工具主要是为了调试libtorch代码,毕竟libtorch的C-API,相比Pytorch上手难度大一点,主要原因还是用的不够多,很多语法不熟悉,查官方文档资料也不多,你自己一个一个试,编译debug输出结果很麻烦…
有了这个工具,可以直接尝试代码API而不需要手动编译print cout啥的,在jupyter中就能知道你的C++代码写的对不对。

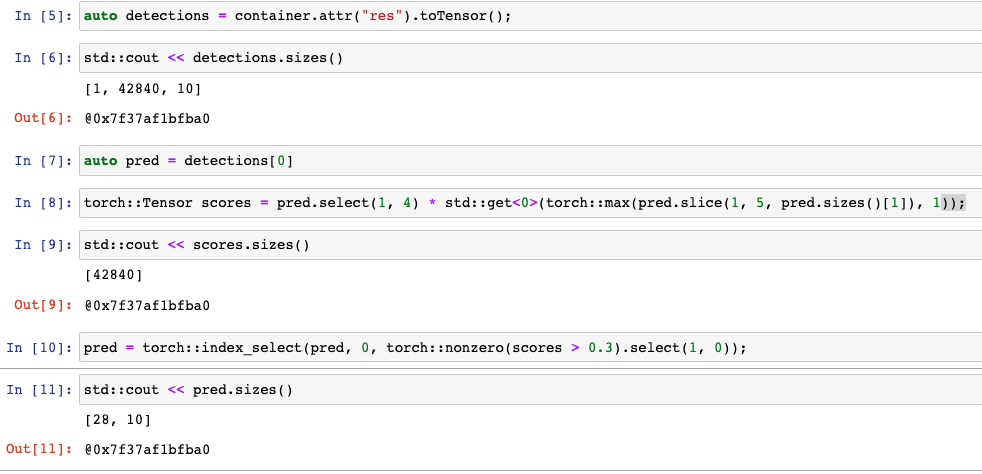
又比如,我想用libtorch写一个检测模型的后处理,就拿YOLOV5来说,我们有python版本的后处理,但是C++版本libtorch的就得自个儿写,但是对libtorch的API不是很熟悉,咋办,有了这个玩意儿就可以一步一步调试了:
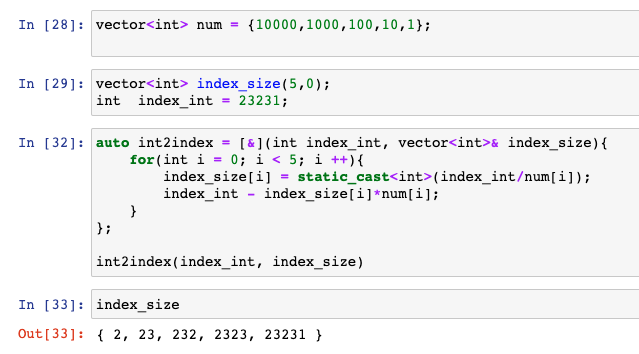
其他的比如你想实现的一些小功能,也可以直接上:
说实话,挺牛逼的挺实用。
主要的是省去编译、链接、执行的过程,一些简单的想验证的语法,没有必要重复编译运行,直接通过这个可视化notebook就能跑。

这个工具的核心是xeus-cling。
xeus-cling is a Jupyter kernel for C++ based on the C++ interpreter cling and the native implementation of the Jupyter protocol xeus.
xeus-cling又是基于cling,什么是cling呢?
核心Cling interprets C++
Cling is built on the top of LLVM and Clang libraries. In addition to standard interpreters it has a command line prompt and uses just-in-time (JIT) compiler. This kind of software application is commonly known as an interactive compiler.
Cling started off as a contemporary, high-performance alternative of the current C++ interpreter in the ROOT project – CINT.
类似于一个解释器,兼容C++的语法。
这个工具比较适合以下的一些场景:
Learning C++
One use case of cling is to aid the C++ learning process. Offering imediate feedback the user can easily get familiar with the structures and spelling of the language.
用来学习C++语法挺合适。写了运行看对不对就行。
Runtime-Generated Code
Sometime it’s convenient to create code as a reaction to input (user/network/configuration). Runtime-generated code can interface with C++ libraries.
Creating scripts
The power of an interpreter lays as well in the compactness and ease of repeatedly running a small snippet of code – aka a script. This can be done in cling by inserting the bash-like style line:
可以像Python一样,当成脚本来运行。不过个人感觉还是用python好点,除非你有自己的lib库可以通过这个来调用。
#!/usr/bin/cling
cpp code
Rapid Application Development (RAD)
Cling can be used successfully for Rapid Application Development allowing for prototyping and proofs of concept taking advantage of dynamicity and feedback during the implementation process.
安装
安装比较简单,目前只支持Linux和MacOS。
首先需要有一个anaconda的环境,然后conda install xeus-cling -c conda-forge就可以了。同时也要安装jupyter:conda install jupyter notebook。这个目前只支持X86环境,如果是ARM主机,可能需要大家自己编译一下依赖库(我当时在M1的mac上没有编译成功,后来没有再试了),因为官方只是提供ARM版本的预编译库。
安装好之后可以通过jupyter kernelspec list查看kernel Spec,可以看到支持C++11-17:
(pytorch) oldpan@oldpan-ROG-Flow-X13-GV301QE-GV301QE:~/code$ jupyter kernelspec list
Available kernels:
python3 /home/oldpan/anaconda3/envs/pytorch/share/jupyter/kernels/python3
xcpp11 /home/oldpan/anaconda3/envs/pytorch/share/jupyter/kernels/xcpp11
xcpp14 /home/oldpan/anaconda3/envs/pytorch/share/jupyter/kernels/xcpp14
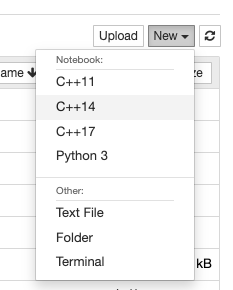
xcpp17 /home/oldpan/anaconda3/envs/pytorch/share/jupyter/kernels/xcpp17打开jupyter notebook创建的时候可以选择kernel:
基本操作
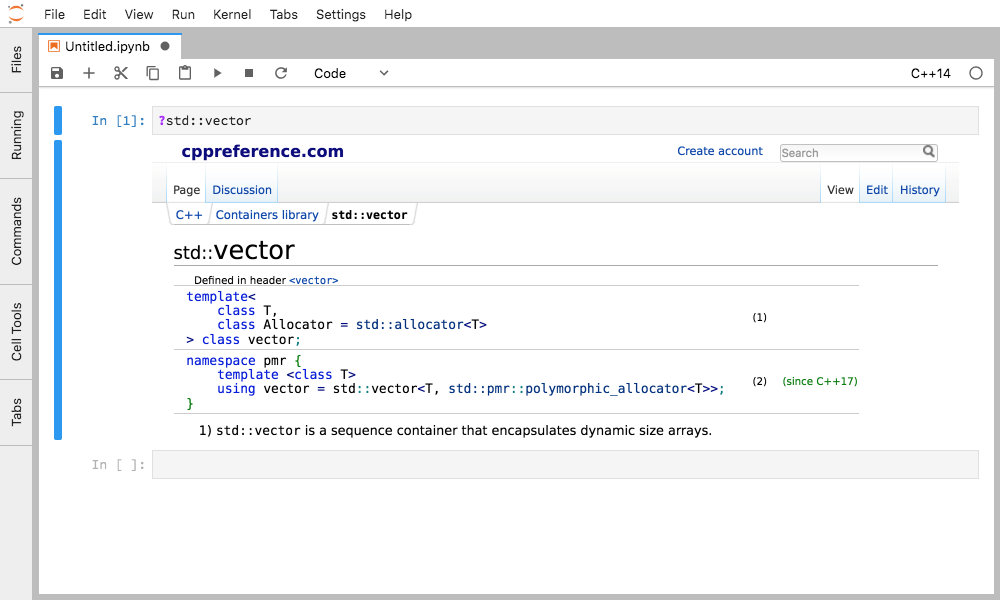
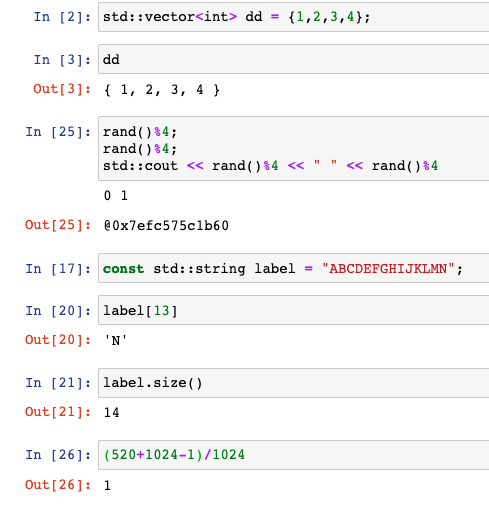
基本操作就比较简单,直接打开kernel写C++代码就可以,有些查看操作不需要printf或者cout打印,直接输入变量运行一下就行:
修改编译选项
既然是C++,我们可以修改编译flag和编译标准,直接在/home/oldpan/anaconda3/envs/pytorch/share/jupyter/kernels/xcpp14中改就行:
// /home/oldpan/anaconda3/envs/pytorch/share/jupyter/kernels/xcpp14
{
    "display_name": "C++14",
    "argv": [
        "/home/yoyo/miniconda3/envs/xwidgets/bin/xcpp",
        "-f",
        "{connection_file}",
        "-std=c++14",
        "-pthread",
        "lpthread"
    ],
    "language": "C++14"
}比如你想要使用线程库,按照上面的添加-pthread和lpthread就可以。
链接第三方库
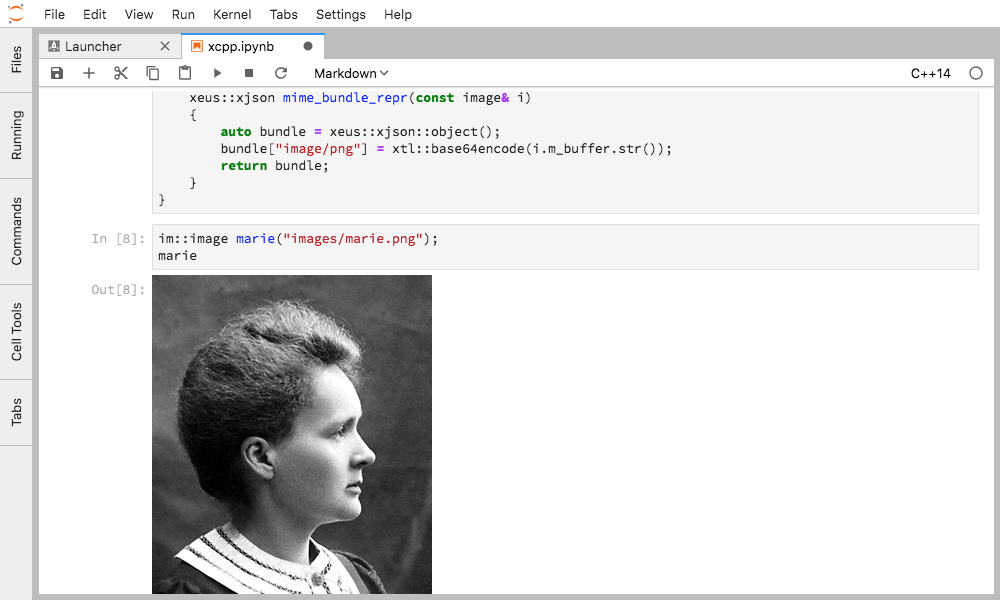
比如我要用libtorch,可以使用以下命令链接需要的库和头文件:
#pragma cling add_include_path("inc_directory")#pragma cling add_library_path("lib_directory")#pragma cling load("libname")
具体是这样,先include头文件和设置动态链接库地址:
#pragma cling add_library_path("/home/oldpan/software/libtorch/lib/")
#pragma cling add_library_path("/home/oldpan/Documents/cuda-11.4/lib64")
#pragma cling add_include_path("/home/oldpan/software/libtorch/include/")
#pragma cling add_include_path("/home/oldpan/software/libtorch/include/torch/csrc/api/include/")
然后load具体的动态库:
#pragma cling load("/home/oldpan/software/libtorch/lib/libtorch_cuda.so")
#pragma cling load("/home/oldpan/software/libtorch/lib/libc10.so")
#pragma cling load("/home/oldpan/software/libtorch/lib/libc10_cuda.so")
#pragma cling load("/home/oldpan/software/libtorch/lib/libtorch.so")
#pragma cling load("/home/oldpan/software/libtorch/lib/libtorch_cuda.so")
然后include头文件

就可以直接调用libtorch-API了。
其他用法
其他的我感觉用处不大了,看图片啥的使用python版本就可以,这个工具更多的是快速验证C++代码是否正确,节省我们的调试时间。
参考链接
- https://github.com/QuantStack/xeus-cling
- https://xeus-cling.readthedocs.io/en/latest/build_options.html
- https://xeus-cling.readthedocs.io/en/latest/magics.html
声明:文中观点不代表本站立场。本文传送门:https://eyangzhen.com/28870.html